
Send Emails with a Custom Domain Using SendGrid and Rails
09 Aug 2017SendGrid is a cloud-based email delivery service that assists businesses with email delivery. And that probably is the most boring definition ever, considering the powerhouse of tools that SendGrid provides.
With SendGrid you don’t just get to send emails, you get to monitor link clicks, un-subscription rates, geographical tracking and a lot more. In this tutorial I’ll walk you through building your own email sending service on Rails with SendGrid.
The first thought that probably pops up into your mind is why SendGrid? Believe me, you’ll figure out for yourself by the end of this tutorial.
Let’s first create a Rails project via command line. I’ll be using Rails 5 here.
rails new sendemail
(How creative of a name is sendemail though?)
We would like for users to sign up and then maintain a personal profile of all the emails they send. So, we’ll be adding the Devise gem here. I won’t be covering how to add Gems and customize Devise in this tutorial, but here’s a few sources that cover it.
We’ll then create a scaffold called email. The model attributes will be the receiver field, subject field and body field. Everything necessary to create an email! Oh, we’ll also be adding a user_id mapping column, which will be used to query emails belonging to an user.
rails g scaffold email user_id:integer:index receiver:string subject:string body:text
Here’s where the fun starts.
To send emails from your Rails application, you need to,
- Add email provider credentials to your devlopment.rb (production.rb if in production environment). I’ll be using Gmail here.
ProTip: If you’ve enabled two factor authentication on your account, you need to create an app password to bypass it.
It’ll look something like this,
config.action_mailer.smtp_settings = {
   :address => 'smtp.gmail.com',
   :port => 587,
   :user_name => '[email protected]',
   :password => 'frsghrjdyquftlsh',
   :authentication => :plain,
   :enable_starttls_auto => true
}
- Add this to your
app/mailers/application_mailer.rb. This will send the email.
def send_it(email)
  @email = email

  mail(
    from: email.user.email,
    to: email.receiver,
    subject: email.subject
  )
end
Notice that I have specified the from address as well. Also, I have NOT provided a default_from in ApplicationMailer.
You’ll also have to create a app/views/application_mailer/send_it.html.erb and add this to it,
<%= @email.body %>
This prints the body of the email into what is being sent out.
- I’ve also added the method to trigger email sending to our model. Here’s how it looks,
class Email < ApplicationRecord
  belongs_to :user
  validates_format_of :receiver, with: /\A([^@\s]+)@((?:[-a-z0-9]+\.)+[a-z]{2,})\z/i

  after_create :deliver
  after_update :deliver

  def deliver
    ApplicationMailer.send_it(self).deliver_now
  end
end
I’ve created simple after_create and after_update callbacks that send the email.
Let’s test and see if this works.
I’ll create an user by signing up with swaathi @ skcript email address. And then send an email to swaathikakarla @ gmail.

Let’s see what happens.
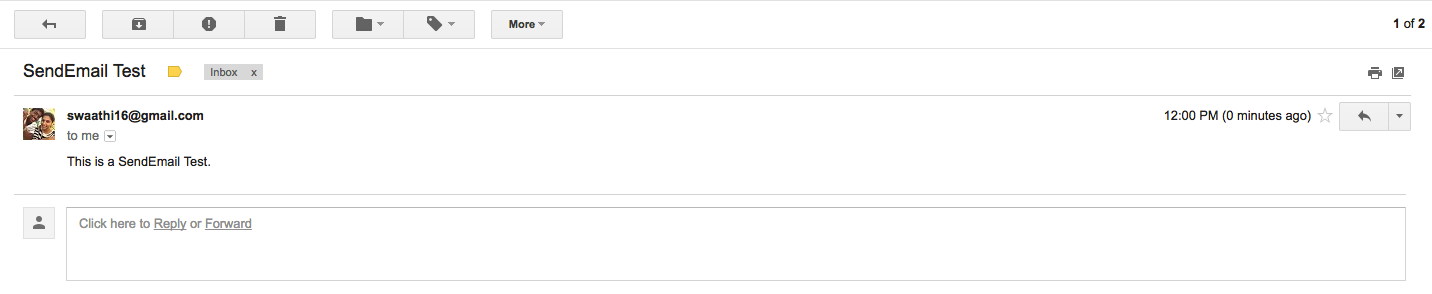
Hey! It got sent from swaathi16 @ gmail. But, the from section was set to swaathi @ skcript. Why did this happen?
It’s because of the credentials in development.rb. We added Gmail credentials belonging to swaathi16 @ gmail. So, no matter what you over-ride it’ll be sent from the email that’s tied to the credentials.
This works perfect when you don’t want someone masking your identity. But often sucks when you just want to send an email from another address, with no way of tracking incoming emails. But, with SendGrid you can send emails as other addresses - but it’s not as scary as it sounds - it’ll be appended with an ‘via Domain’ text. And, any replies to the email will automatically be send to the address itself.
Let’s see how that works!
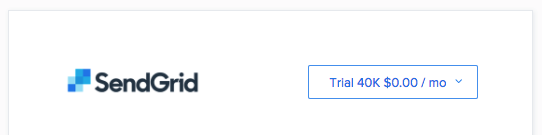
- Sing up on SendGrid Headover to the signup page of SendGrid, and to test things out select the FreeTrial. This allows you to send 40,0000 emails per day for 30 days.
- Head over to the Whilelabels section After that visit the Settings section in the sidebar and then click on the Whitelables link from the dropdown.

P.S, I wrote this article for Sweetcode, a place for techies to share what they know.
